This post includes an Amazon affiliate link. This means I earn a commission if you click the link and purchase the item, at no additional cost to you.
If you’ve never tried changing strings on an acoustic guitar or simply want to get better at it, this post is for you. Learning to change guitar strings takes a bit of practice and repetition. This post covers every step of the process so you can learn how to do this yourself!
Keep in mind that this method is meant for nylon string guitar and not steel string guitars because they are set up differently. Check out this other post to learn how to change steel strings on an acoustic guitar (with pins).
Let’s get started!
1. Remove old strings
Turn the tuning pegs and make sure the sound is becoming lower to decrease the string tension. Keep turning until you can slide the strings out comfortably.
Some people like to cut the strings to save time, but be careful to first loosen the strings quite a bit before doing so. The reason is that the string can fling in random directions and hit you if the string is still very tight when cutting it.
2. Insert the string on the bridge
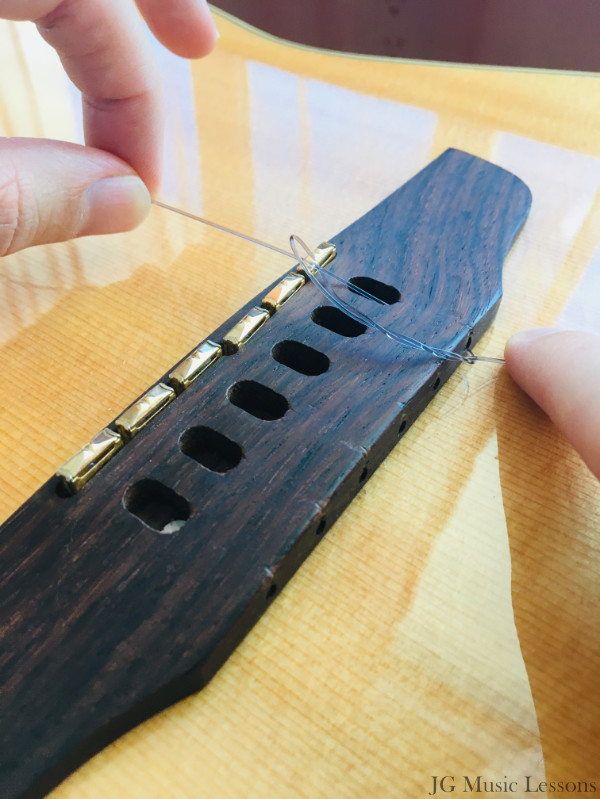
Now that you’ve removed the old strings, you can start by inserting the thinnest string through the first hole on the bridge (the darker brown piece) as shown in the image below.
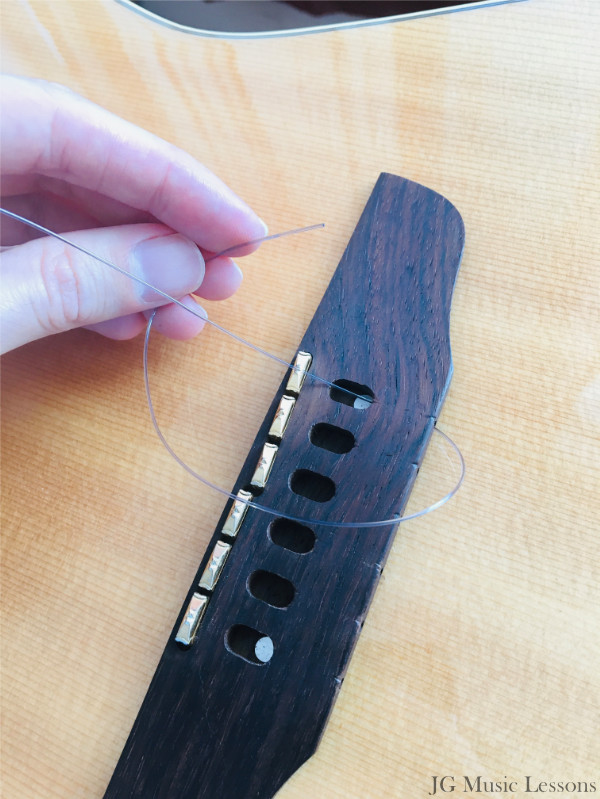
For a lefty guitar setup, insert the thinnest string on the other side (closest to your leg) when holding the guitar.
3. Double-loop the string to secure it
In the previous picture, you can see how I brought the tip of the string under. Now you’ll take the tip, bring it over the string and insert it through the hole you made.
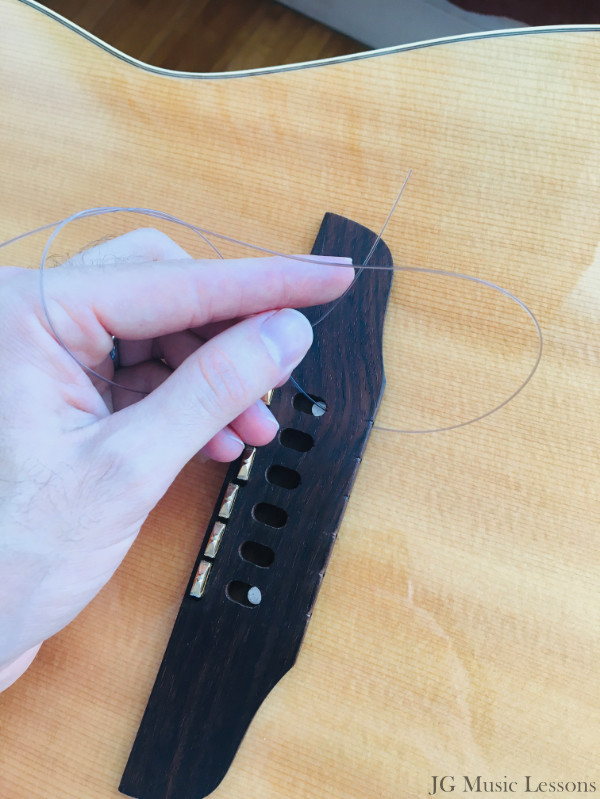
Insert the tip in the hole once again in the same direction.
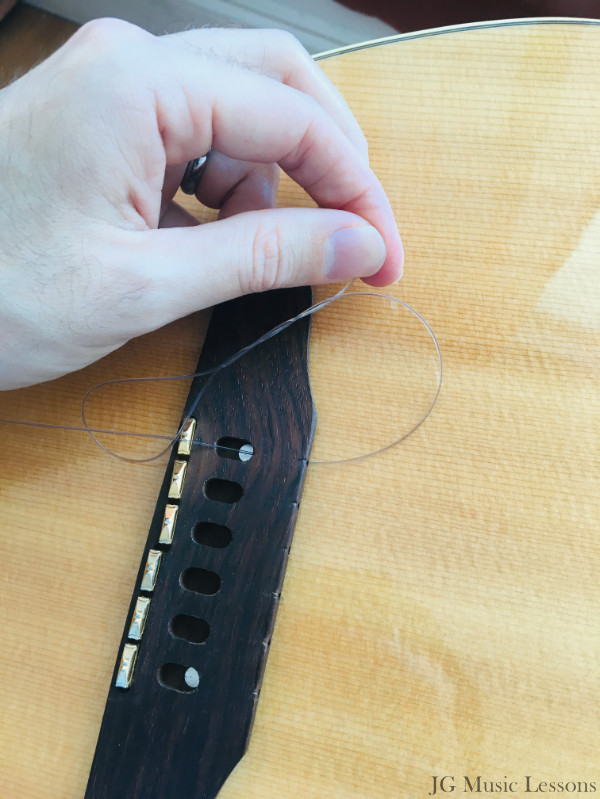
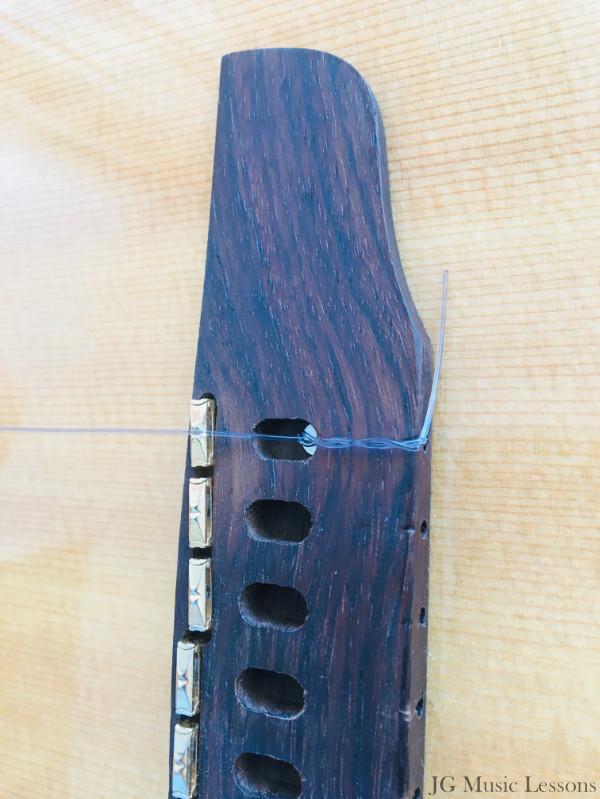
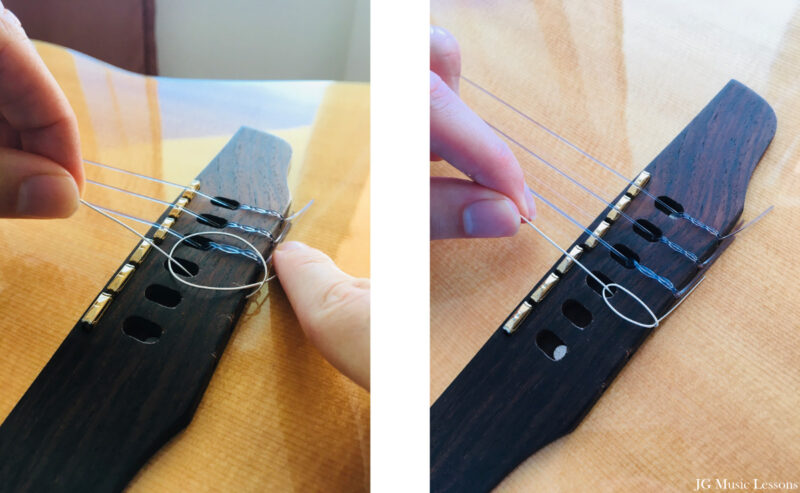
Hold the tip of the string down against the body of the guitar as you pull the opposite side to secure the string.
The result should look like this:
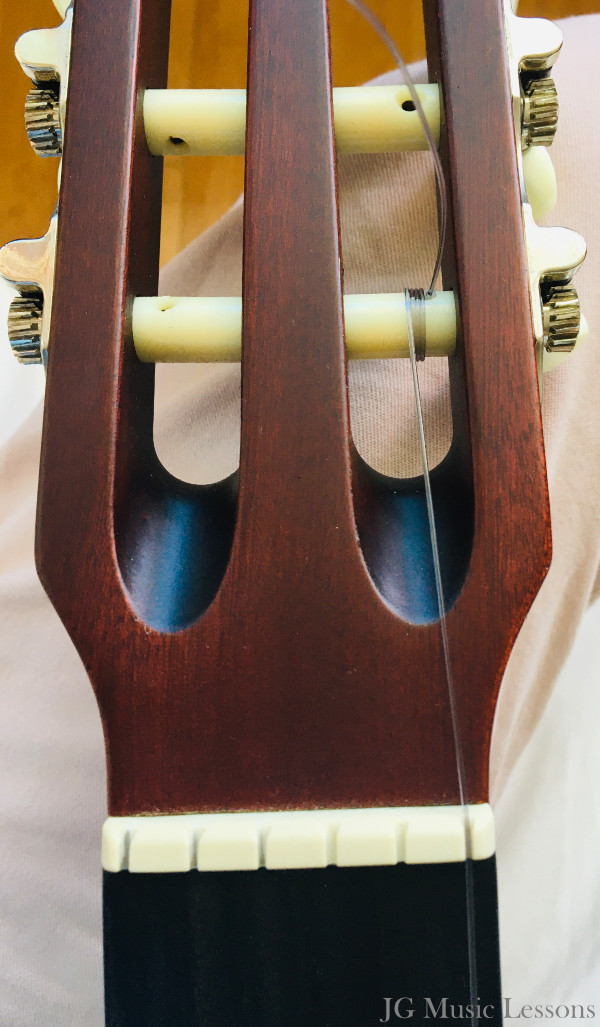
4. Insert the string on the tuning peg
Leave about 4 – 6 inches after inserting the string in the hole by the tuning peg. I like to make a simple not there to make sure the string doesn’t slip out when tuning later.
Start winding as you hold the string in place with your other hand.

When you hold the string down while winding, the string lines up nicely like this:
4. Double-loop strings 2 and 3
Repeat the previous steps for the 2nd and 3rd strings as well (B and G.) The process will be a little different on strings 4, 5, and 6 which you’ll see next section.
Be sure to align the strings with the right tuning peg.
5. Single loop strings 4, 5, and 6
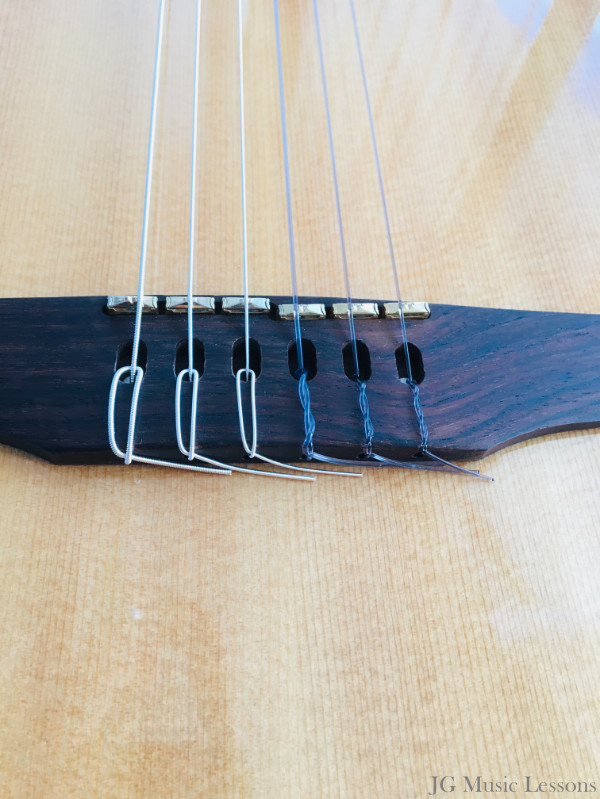
For these thicker strings, we simply do one loop to secure them on the bridge of the guitar. This time you wrap around the string in the opposite direction like this:
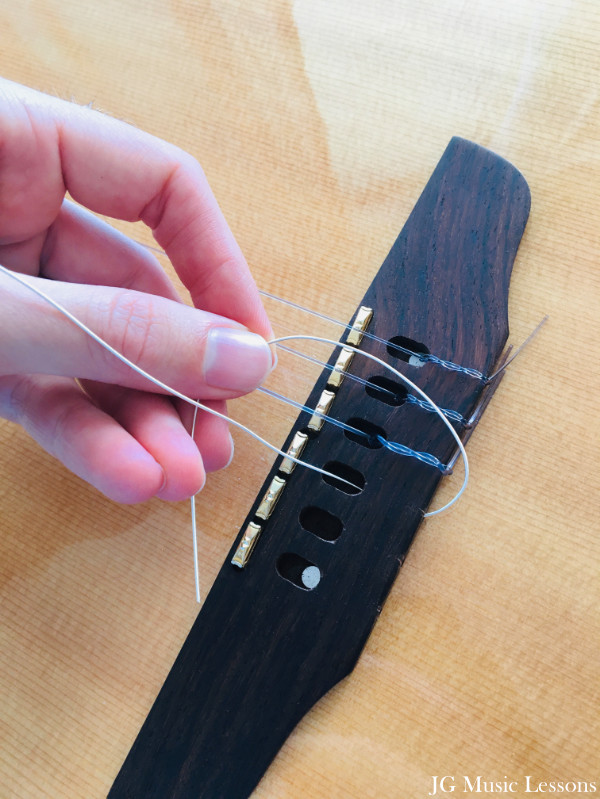
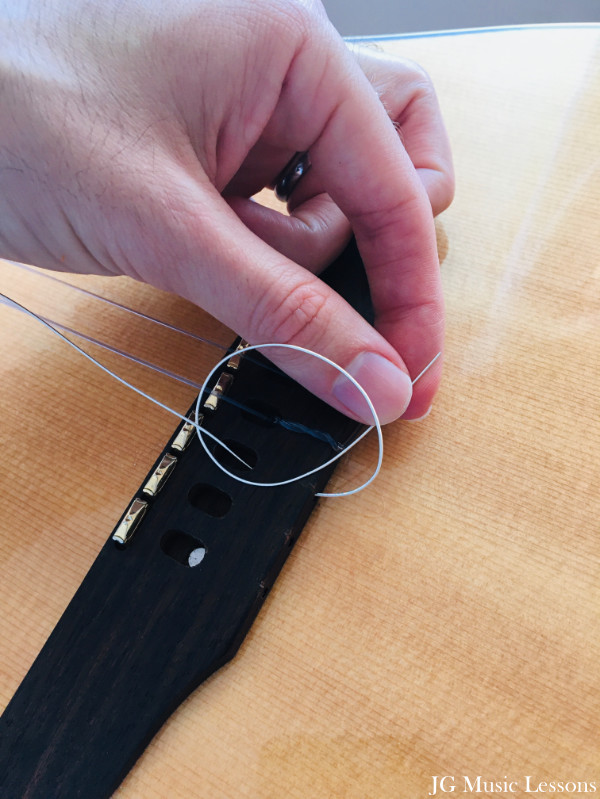
Again, hold the tip down and pull the other side to secure it.
6. Tune the strings
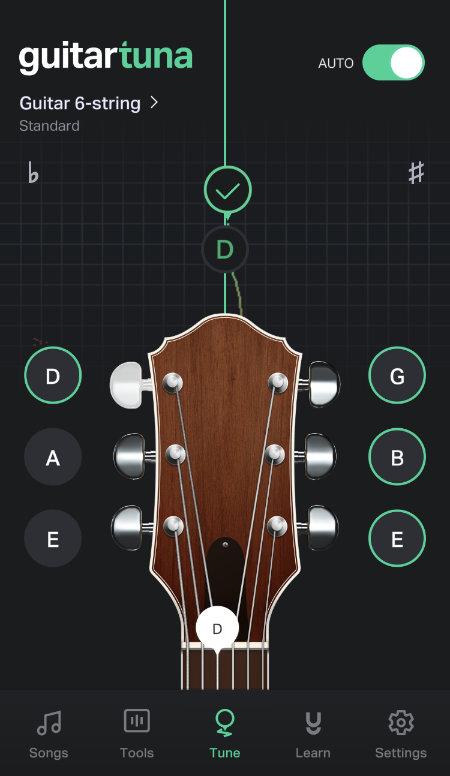
This is the last step of the process where you simply retune the strings. Here is a reference for the note names of each string below.
- 1st string (thinnest) – E
- 2nd string – B
- 3rd string – G
- 4th string – D
- 5th string – A
- 6th string (thickest) – E
Keep in mind that it’s normal for some strings to quickly go out of tune for a day or two as they settle in.
Here is a screenshot of a free app I use to tune guitar strings called Guitartuna.
7. Trim the strings (optional)
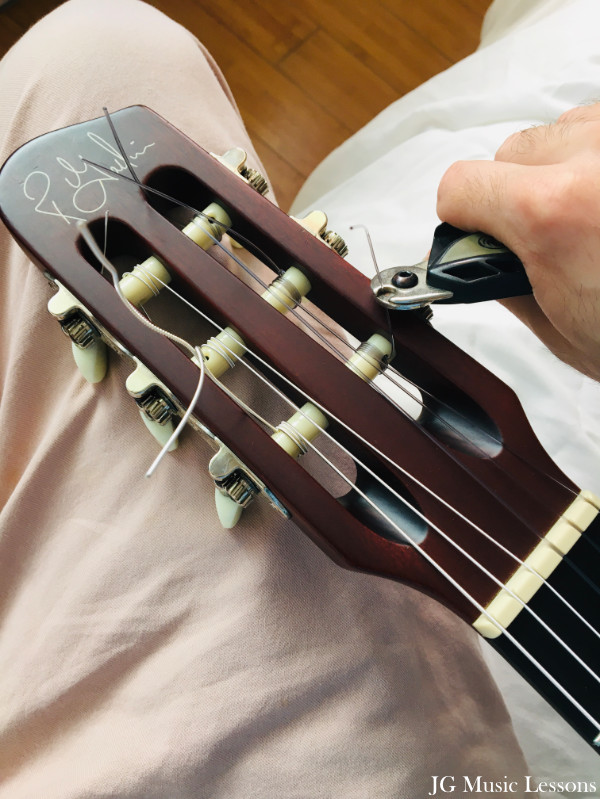
If you have get a tool like the string clipper you see in the image below, you can trim out the ends of the strings so it looks clean once you’re done changing the strings.
Recommended tool: String winder/string clipper
This tool is convenient to have because it serves two purposes. It speeds up the process of winding the strings and it also has a clipper on the other side to trim the strings after you change them.
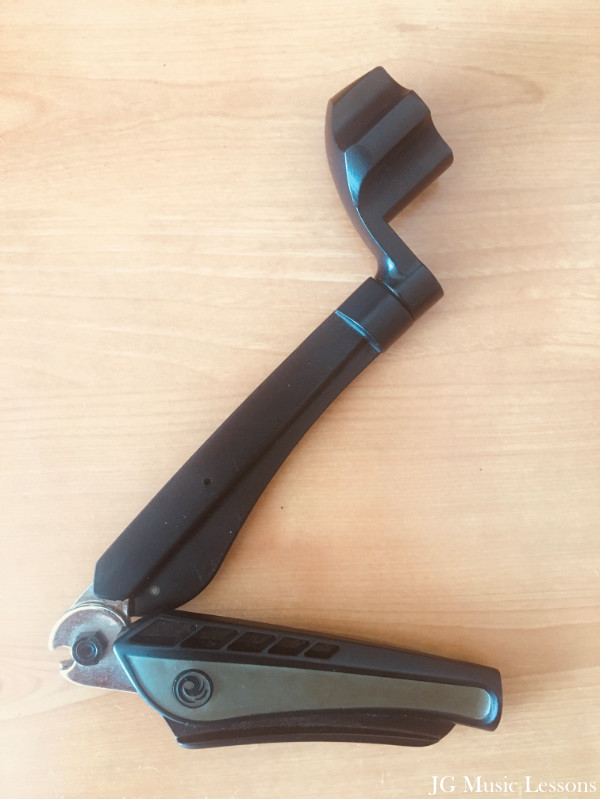
You can check out this string winder and cutter by D’addario.
This is what it looks like after trimming the strings.

How often should you change guitar strings?
How often you should change your strings depends on how often you play your guitar. If you’re picking up the guitar several times a week, you’ll notice some discoloration on the strings and the sound gets increasingly duller. This can take roughly 1 to 3 months if you are playing often but I would wait longer if you play occasionally.
This is what the discoloration of the strings look like to indicate it’s about time to change the strings.
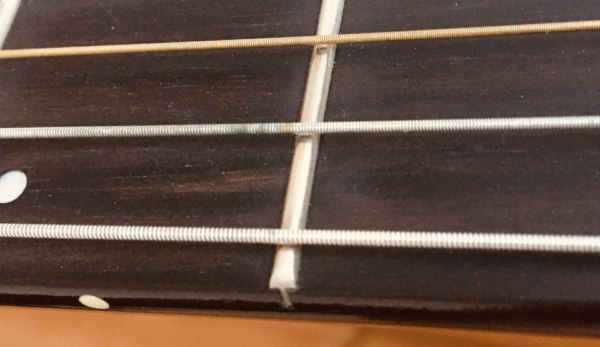
If you play strings long enough, you can visibly see small threads coming out of the strings. At this point, I would recommend changing them to have the best quality sound with a new set of strings.
Can you put nylon strings on a steel string guitar?
I don’t recommend putting nylon strings on a steel string guitar because the guitar is not designed for it and the sound will not be optimal. Nylon strings are meant for classical guitars and steel strings are for steel string guitars. Whatever guitar type you bought initially should be the same kind of strings you should stick with.
If you’re not familiar with your guitar type or what you strings you should get, take your guitar to a local music store and they should help you choose something that will best work for you.
Recommended nylon strings
When purchasing strings, there are many variables like string tension (low to high), brightness, the material, etc. The most important thing is to go with a reputable brand to get good quality strings. I’ve use brands like D’addario, Ernie Ball, and La Bella and switch them up from time to time. In terms of price, I usually never spend more than 10 dollars on a new pair of strings, and that works perfectly fine for me.
There are a variety of brands to experiment so see what works best for you.
These are the strings I just put on my guitar and they sound great. I recommend these D’addario, Pro Arte Nylon core strings.
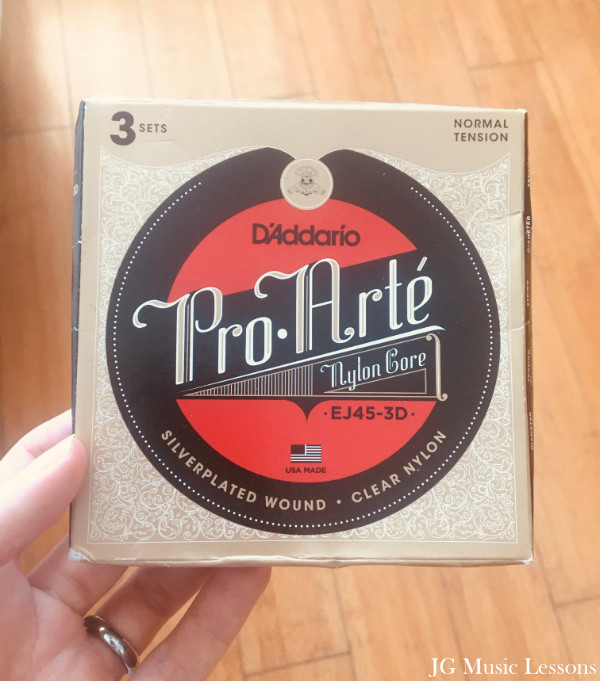
Check this link to see the latest price on Amazon.
String maintenance tips
- Avoid playing with sweaty, dirty hands to keep the strings clean.
- Occasionally wipe the strings down with a cloth or rag.
- Keep a habit of storing guitars in their case to avoid rusting that can be caused by humidity.
Wrapping up
In this post, we looked at how to restring a classical nylon string guitar with a few steps that you can try for yourself. Be patient if this is your first time changing your guitar strings. It may take you 15 to 20 minutes or longer if it’s your first time doing it. The more you repeat this restringing process, the better and quicker you’ll get at it.
The guitar in this post is a Godin Multiac Nylon Encore but the process is the same for other nylon string guitars. I hope this post has been helpful for you to learn this skill yourself and not have to go into a guitar store or ask someone else to do it for you the next time around.
If you’re interested in learning to play acoustic guitar, see this post on how to finger pick on guitar.
📘 Get the free guitar practice guide here!
All the best,
JG Music Lessons
📙 Kickstart your guitar playing with our step by step guide: Guitar Essentials.
🎸 Looking for a travel or half-sized guitar? See this one.
🛠 See our other music recommendations.
🤝 Support the site to help us to create better content for you!
Level up with the FREE guitar practice guide and effectively improve your playing! 🎸
Get it sent to your email!

