This post includes Amazon affiliate links. This means I earn a commission if you click the link and purchase the item, at no additional cost to you.
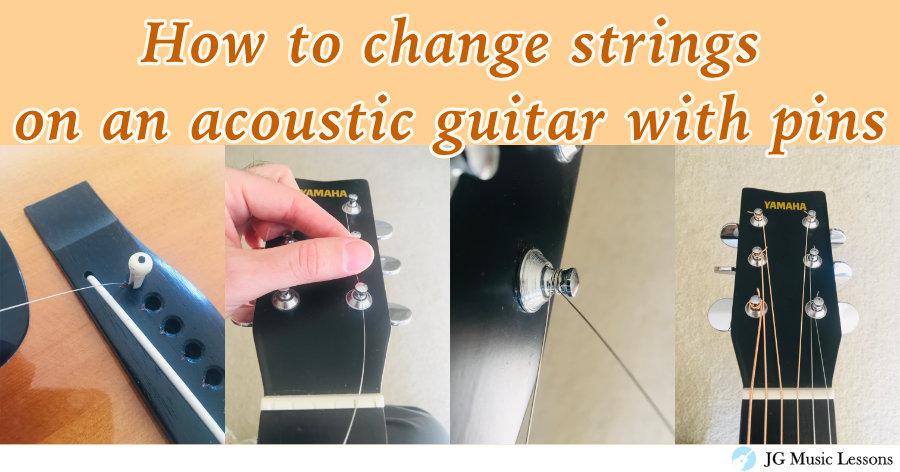
If you’ve never tried changing strings on an acoustic guitar or simply want to get better at it, this post is for you. Learning to change guitar strings takes a bit of practice and repetition. This lesson covers every step of the process so you can learn how to do this yourself!
Keep in mind that this method is meant for steel string guitars and not nylon string guitars because they are set up differently. Check out this other post to learn how to change nylon strings on an acoustic guitar.
Let’s get started!
1. Remove old strings
Turn the tuning pegs and make sure the sound is becoming lower to decrease the string tension. Keep turning until you can slide the strings out of the tuning pegs.
Some people like to cut the strings to save time, but be careful to first loosen the strings quite a bit before doing so. The reason is that the string can fling in random directions and hit you if the string is still very tight when cutting it.
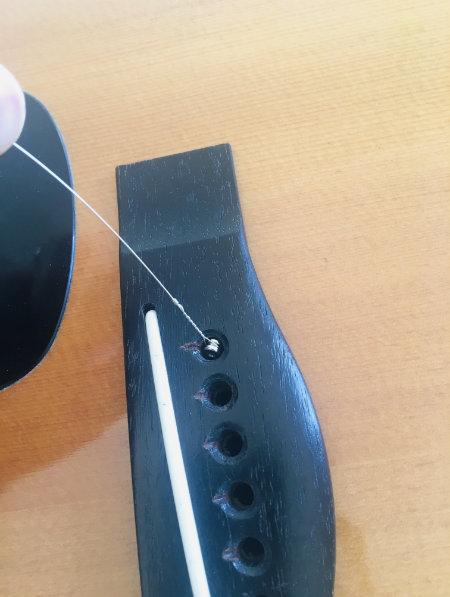
2. Remove pins
After you’ve decreased the string tension, you would remove the pins by pushing them out through the sound hole of the guitar as shown in the image below. You can do this process one string at a time or loosen all of the strings first and then push out the pins from the inside of the guitar.
As a side note, you may also hear these pins referred to as “bridge pins”.
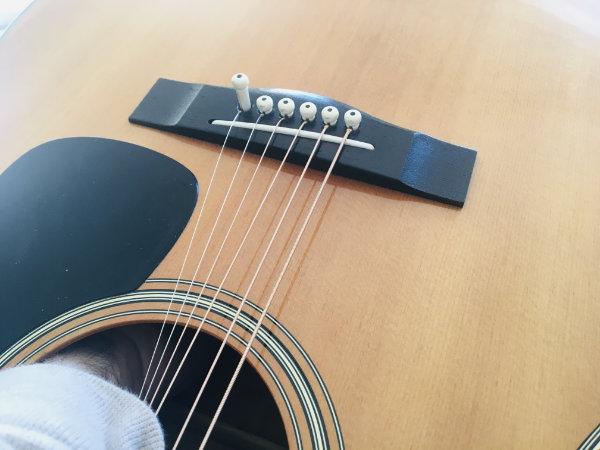
3. Insert the string on the bridge
After the pins are removed, you would insert each string through the holes of the bridge (the darker brown piece on the guitar). I’m starting with the thinnest string here.
For a lefty guitar setup, you would insert the thinnest string on the other side (closest to your leg) when holding the guitar.
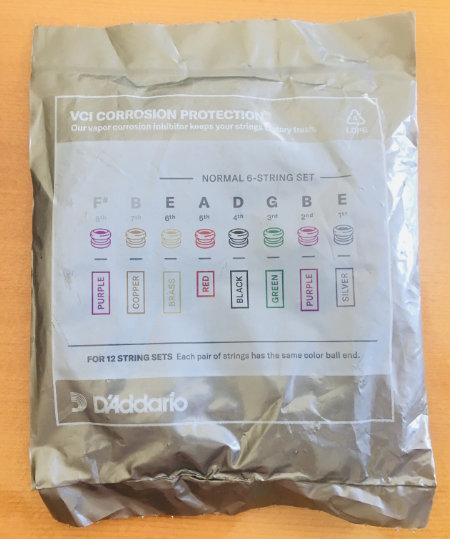
The packaging tells you the order of strings according to a specific color. Here is an image of the string package I’m using here below. These are the EJ16 Phosphor Bronze by D’Addario – light tension.
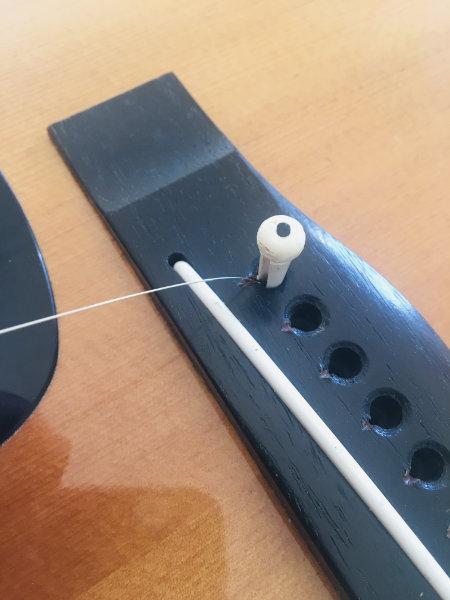
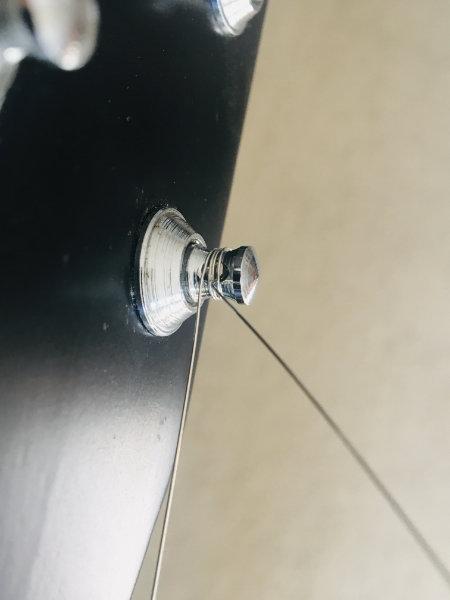
4. Insert the bridge pin
Once the string is in, you insert the pin to secure it. Make sure that the cut-out of the pin is facing toward the fretboard as shown in the image below.
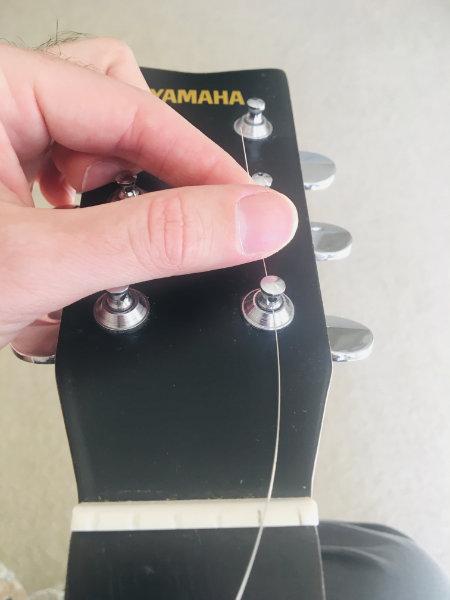
5. Insert the string on the tuning peg
Leave about 4 – 6 inches after inserting the string in the hole of the tuning peg.
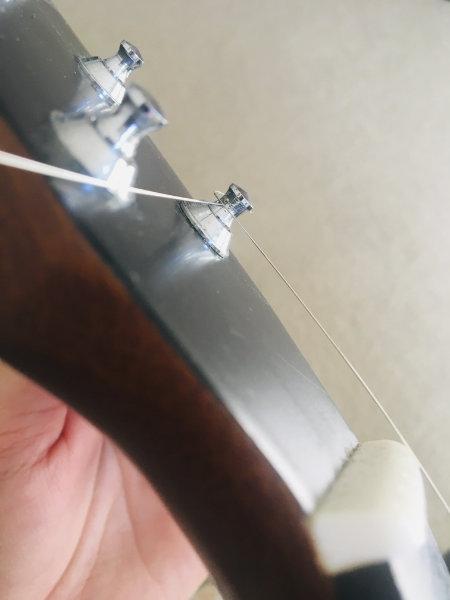
6. Winding the string
There are some extra steps to take when winding each string to make sure they are secure.
When first starting to wind the string, let the remaining part of the string (on the other side of the hole) go under the section that has tension. See the image below to better understand this.
I wind the string by turning the tuning peg counterclockwise.
As you continue to wind the string, let the excess string now go above the part that is being wound. This will help to secure the string in place. I like to hold the string down while winding so that the string lines up more evenly.
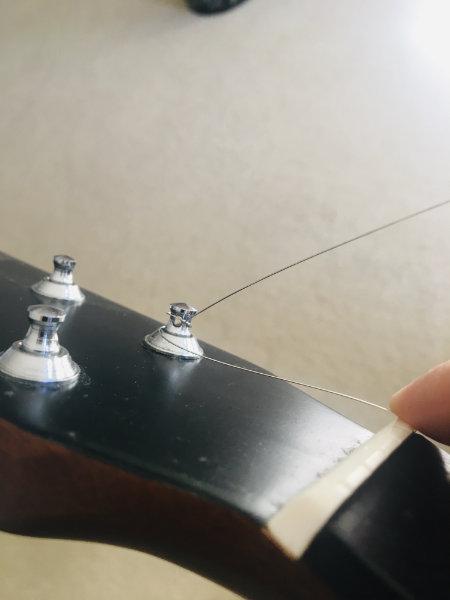
This is what it should like after you continue to wind the string. As you can see in the image below, the excess part of the string is wrapped in between layers of wound string.
7. Repeat steps 3 through 6 each strings
As we covered in the previous steps for the 1st string, you would do the same for strings 2 through 6.
For strings 1 through 3, I wind the tuning pegs counterclockwise and strings 4 through 6 in a clockwise direction. I find this to be more natural when adjusting the tuning but you can choose whatever direction is more comfortable for you.
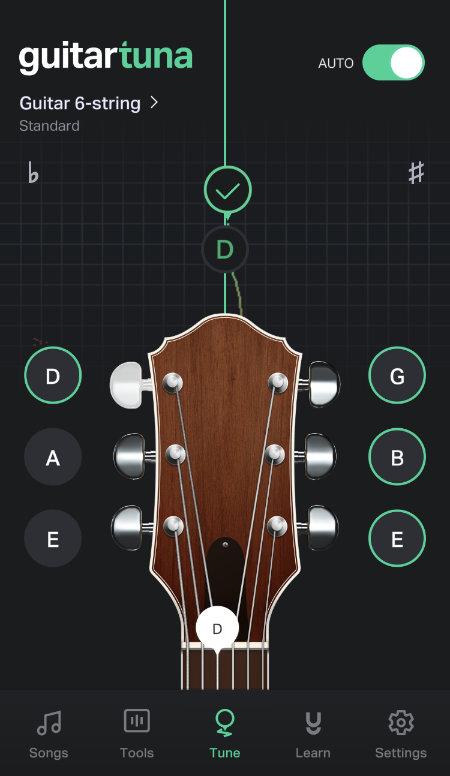
8. Tune the strings
This is the last step of the process where you simply retune the strings. Here is a reference for the note names of each string below.
- 1st string (thinnest) – E
- 2nd string – B
- 3rd string – G
- 4th string – D
- 5th string – A
- 6th string (thickest) – E
Keep in mind that it’s normal for some strings to quickly go out of tune for a day or two as they settle in.
Here is a screenshot of a free app I use to tune guitar strings called Guitartuna.
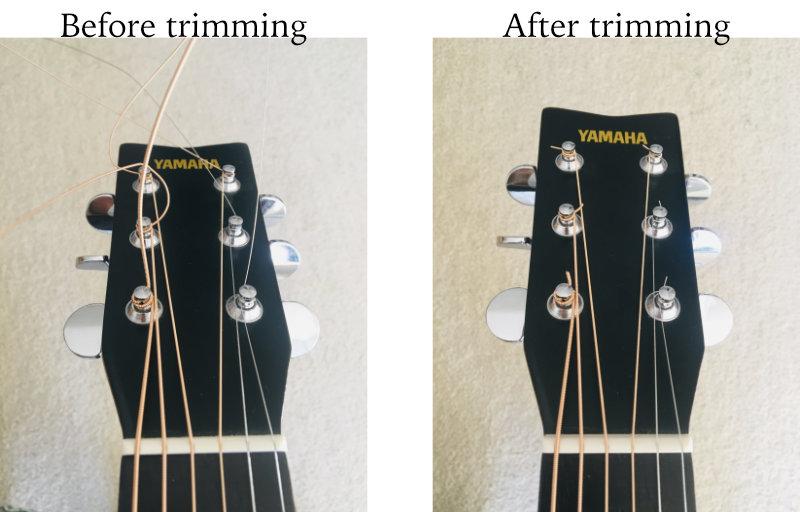
9. Trim the strings
This step is optional, but I like to trim the ends of the strings with a guitar string clipper to make it look nice and clean once you finish changing the strings.
Recommended tool: String winder/string clipper
This tool is convenient to have because it serves two purposes. It speeds up the process of winding the strings and it also has a clipper on the other side to trim the strings after you change them.

If you want to get something like this, check out this string winder and cutter by D’addario.
Can you put steel strings on a nylon string guitar?
I don’t recommend putting steel strings on a nylon string guitar because the guitar is not designed for it and the sound will not be optimal. Steel strings are meant for steel string guitars and nylon strings are for classical acoustic guitars. Whatever guitar type you bought initially should be the same kind of strings you should stick with.
If you’re not familiar with your guitar type or what you strings you should get, take your guitar to a local music store and they should help you choose something that will best work for you.
String maintenance tips
- Avoid playing with sweaty, dirty hands to keep the strings clean.
- Occasionally wipe the strings down with a cloth or rag.
- Keep a habit of storing guitars in their case to avoid rusting that can be caused by humidity.
Wrapping up
In this post, we looked at how to restring a steel string guitar with a few steps that you can try for yourself. Be patient if this is your first time changing your guitar strings. It may take you 15 to 20 minutes or longer if it’s your first time doing it. The more you repeat this restringing process, the better and quicker you’ll get at it.
If you’re interested in learning to play acoustic guitar, see this post on how to finger pick on guitar.
📘 Get the free Practice Blueprint: Build better habits and make your progress more consistent. Download the free guide →
JG