
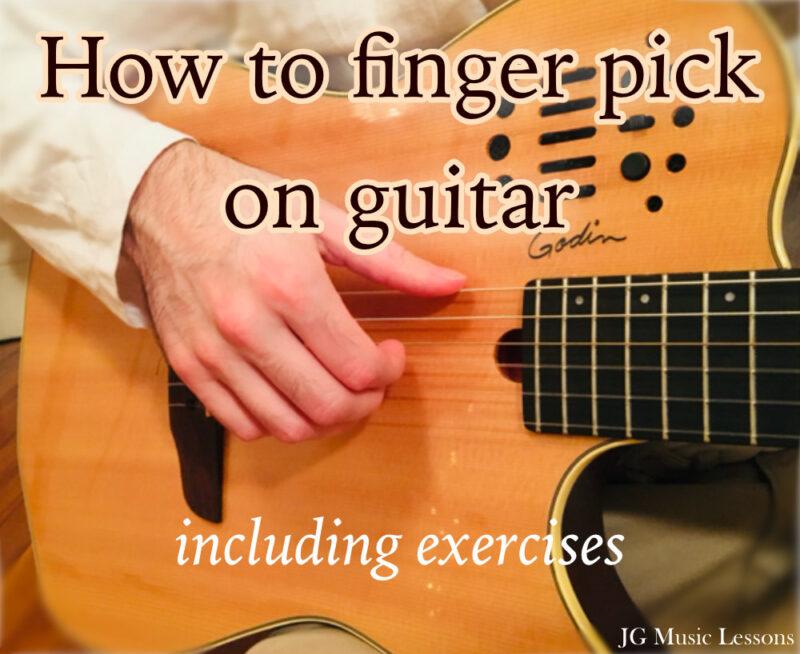
Fingerpicking or finger-style playing is a method of playing guitar strings using your fingers as opposed to using a pick that you grip between your fingers.
The fingerpicking technique is a beautiful style of playing which opens up many sound possibilities on the guitar. This style ranges from being able to play single note melodies up to complex arrangements that can connect a melody, chords and bass notes together.
This lesson covers:
- Symbols used for fingerpicking
- How to position your hand and fingers
- How to read sheet music that uses fingerpicking
- Fingerpicking exercises to improve your technique
Let’s get started!
Foundations Roadmap Focus · View Roadmap →
Use the tab-reading skill from the last lesson as you begin fingerpicking. Your goal is to keep your picking hand relaxed and play one simple exercise by alternating your index and middle fingers.
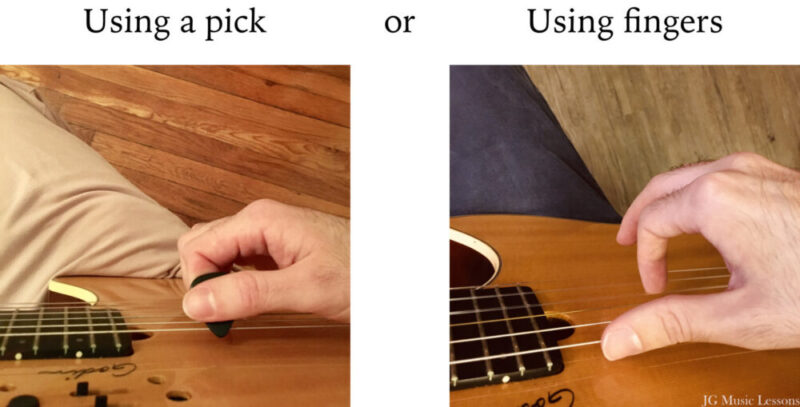
Comparison between fingerpicking and using a pick
Before we move on, you can compare the two most common picking methods in the images below.
If you’re still deciding which approach suits you best, see Fingerstyle vs. Pick: Which Method Is Better?
Now, let’s learn the symbols that are used for fingerpicking.
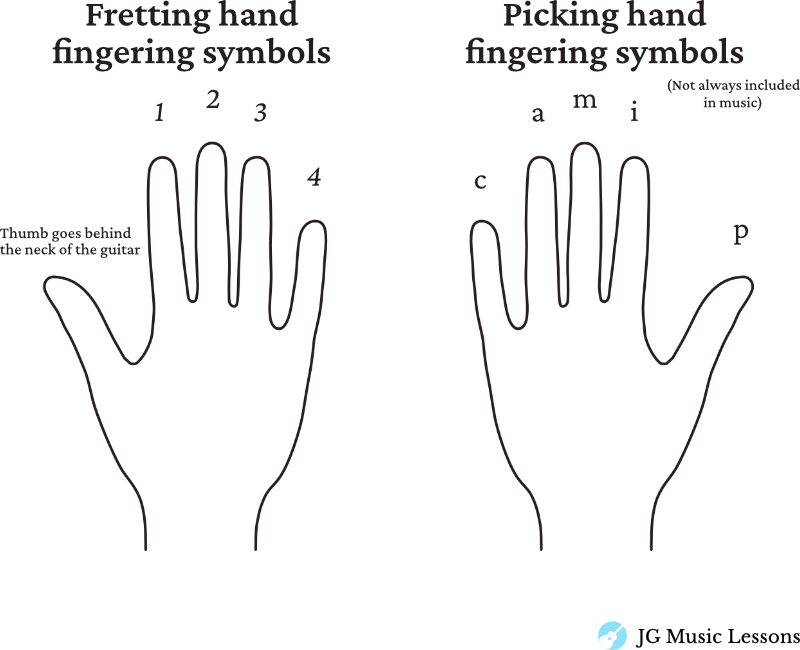
Symbols used for fingerpicking (p, i, m, a, c)
For this roadmap step, focus on recognizing p, i, m, and a. You don’t need to memorize the Spanish words but I’ll write them here for reference.
The symbols used for yours picking fingers come from Spanish words and have become a standard way to notate them in sheet music.
Here are the meaning of the abbreviations used for finger picking:
- ‘p’ is for pulgar or thumb in English.
- ‘i’ is for indice or index (pointer) finger
- ‘m’ is for medio or middle finger
- ‘a’ is for anular or ring finger
- ‘c’ is for chico or pinky (It is not often used until you get to more advanced pieces but we’ll still include it here for now)
These ‘pimac’ symbols are often used in classical music but they can also be found in modern finger style song arrangements.
Take a look at the symbols used for the picking hand in the chart below.
How to position your hand and fingers
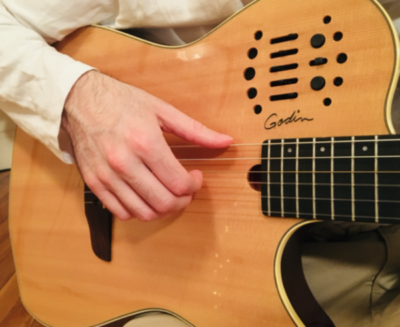
First of all, your arm used to pick should rest comfortably on the body of the guitar as you’ll in the image below. As you do this, your hand should meet the strings diagonally. You shouldn’t need to rotate your wrist too much when playing the strings.
Technique 1: Single note picking (alternating index and middle finger)
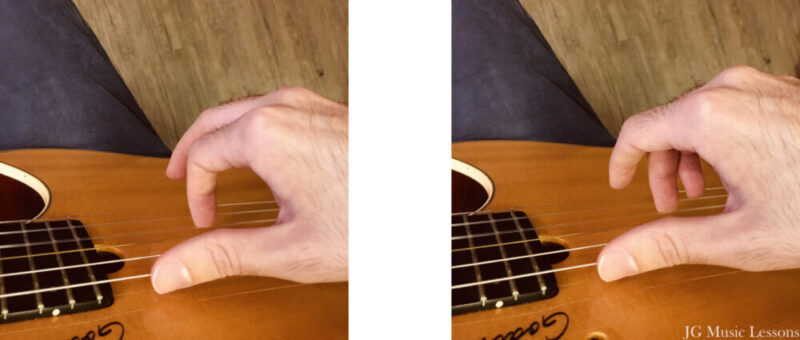
As you can see in the images below, you will want to alternate between your index and middle finger when playing a series of notes. I recommend you keep alternating between these fingers even when you have to switch to another string.
As you pick a string, you can let it rest on the string above it until you use the next finger. I recommend resting your thumb on the 6th string as you can see in the pictures below.
Technique 2: Using all of your fingers
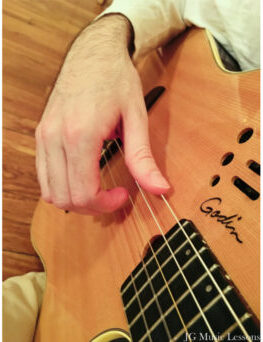
For this technique, your index, middle and ring finger move up towards your palm after playing the string but your thumb will move down when playing a string.
Generally I would use my thumb to play the 6th and 5th string and then use my index, middle and ring finger to play the 4th, 3rd and 2nd string or if I need to play on the higher strings, these fingers would be on the 3rd, 2nd and 1st string. These three fingers are often grouped together when playing several notes at the same time and other chord parts.
Optional notation preview: The next examples show how fingerpicking symbols appear with written music.
How to read sheet music using fingerpicking symbols
When reading sheet music, the p, i, m, a symbols will be indicated either beside or above a note when playing finger style. For example:
Fingerpicking example 1

Fingerpicking example 2
Here is another example using all of your fingers. I am holding down a C Major chord for measures 1, 2, and 4 and G chord on measure 3.


Practice one basic fingerpicking exercise
Start with Exercise 1 and use a slow tempo. A relaxed, controlled motion matters more than speed. Once Exercise 1 feels steady, you can explore the remaining exercises when you’re ready.
If needed, here is a free metronome on our site.
Exercise 1 – Alternating between index and middle finger (2 notes per string)
This first exercise is good for learning to play single notes starting with open strings only.
🔒 This section is for Pro Members only.

Included with Pro
Take this lesson a little further.
This bonus section is included with Pro Membership. Pro also gives you the full Guitar Roadmap to keep your learning in order, plus direct access to me when something isn’t clicking.
Already a member?
Log in →
Already comfortable with the exercises? As an optional extension, learn how to Travis pick on guitar.
Included in Pro Membership ✨
Wrapping up
Start with a relaxed hand and one simple alternating-finger exercise. Once that motion feels comfortable, you can use it in simple pieces and gradually work toward more advanced exercises.
Once the basic motion feels comfortable, you’re ready to apply it to a repeating pattern. If you’d like extra technique tips, these 7 ways to get better at finger picking on guitar are an optional reference.
As you become more comfortable picking with your fingers it becomes really fun to hear yourself play multiple parts of a song. Although some people feel that using a pick is easier, I think the fingerpicking style of playing is worth the learning curve in order to advance your skills and discover new musical possibilities on your instrument.
You can also check out the songs with tabs resource on this site to learn and practice songs that use fingerpicking.
Before continuing
You’re ready to continue when you can keep your picking hand relaxed and alternate your index and middle fingers on an open string or short tab phrase. It’s okay to go slowly or reset your hand.
Next: Continue in the Foundations Roadmap to see where this skill fits and what to practice next.
📘 Get the free Practice Blueprint: Build better habits and make your progress more consistent. Download the free guide →