Have you ever seen someone playing a melody and chords at the same time on guitar and wondered how they make it look smooth and effortless?
When first learning to play guitar, we usually focus on learning single note melodies or chords. But once you get familiar with these different skills, the next step is to try and join the two together.
Connecting melody and chords allows you to play songs more musically and expressively, and to create your own unique compositions. This guide will teach you how to connect melody and chords on guitar, using a variety of techniques and examples.
In short, the steps to connect melody and chords on guitar are:
- Master the melody
- Know the chord progression
- Arranging your chords using triads
- Rearrange your fingers to add the melody notes
- Adding bass parts
- Refining the arrangement
Let’s get started!
1. Master the melody
The first step is to know the melody so well that you don’t have to guess your way around fretboard.
You want to be able to play a melody in different areas of the guitar fretboard because it will allow you to try different ideas and help you move around with ease once you start adding chords to the melody.
Sometimes you might need to move a melody an octave higher to be able to add chords underneath. You may also want to transpose (moving the key center) to optimize your song arrangement.
2. Know the chord progression
Once you have your melody down, now you want to learn the chords and memorize the progression. It will be essential to know how the chords line up with the melody so you can put the two together in the following steps.
To check if you have these parts aligned, you can hum or sing the melody as you play through the chords. Otherwise you can also try recording the melody and then play the chords over the recording or vice versa.
If you can do this, your definitely on the right track to putting the melody and chords together. The better you know the different parts, the easier and quicker it is to arrange a song on the guitar.
If you’re having trouble finding the chords to a song, you might want to check out this post on how to develop ear training to play what you hear.
3. Arranging your chords using triads
Depending where your playing the melody, you have to be able to play different chord variations or inversions in order to smoothly connect it to the melody line. The goal is to play chords in a way that the melody is the highest note in order to highlight it.
Although you don’t always have to play a chord for every melody note, it’s good to know what chord you’re playing over. We’ll talk more about arranging a bit later on to show how you can also spread out the notes in a chord when you have a long melody note.
4. Rearrange your fingers to add the melody notes
Once you have the melody and chords down, now you have to figure out the best way to position your fingers in order to be able to play both parts. Now there are a couple of things to consider when doing this because it can feel like you don’t have enough fingers to do it all at once.
For example, at times you will have to omit certain notes in a chord in order to use your fingers to play other notes that are more important. The melody notes are the priority and then the triad notes that make up the chord come after. You can check out this lesson on how to play triads on guitar.
5. Adding a bass part
In this step, you can also add additional bass notes that add rhythm and depth to the song arrangement. Even adding simple bass parts to the chords and melody can make a big difference to make the song come alive.
Although you might need to simplify some chords even more (think of those simple triad structures), it will make it possible to add extra bass notes.
Using a finger picking style of playing makes it easier to add extra parts but it’s also possible to do if you are using a pick. It’s all about how you put the different parts together that can make an arrangement sound good.
This is easier said than done so start out by adding simple bass parts until you get more confident with the overall arrangement. You want to try to add notes that can complement the melody as opposed to just adding them randomly. As you experiment with different ideas, you’ll get a better sense of what works and what doesn’t.
6. Refining the arrangement
In this final step, you want to focus on how to develop the melody and chord parts to optimize the arrangement. A good way to do this is to have a variation of chords throughout the song. For example, even if a section of a song repeats the same melody, think of how you can change things up the second time around.
I usually like to start simple and then build up the song with either fuller chords or adding more rhythm the second time around a similar section. You can also use fingerpicking patterns to arpeggiate a chord which simply means you spread out the notes of a chord instead of playing the chord at once which can bring a nice contrast to other sections.
There is a lot of room for experimenting and although it can be overwhelming, it’s also the fun part of learning to arrange music. This is a skill that you can always apply to any new song you want to learn and you can constantly keep getting better the more you practice this.
That being said, let’s look at some examples of how to connect a melody and chords with the steps we just covered.
Arranging application examples
We’re going to use the following melody and chords and show you how I would approach the arranging process to play them together on the guitar.
1. Master the melody
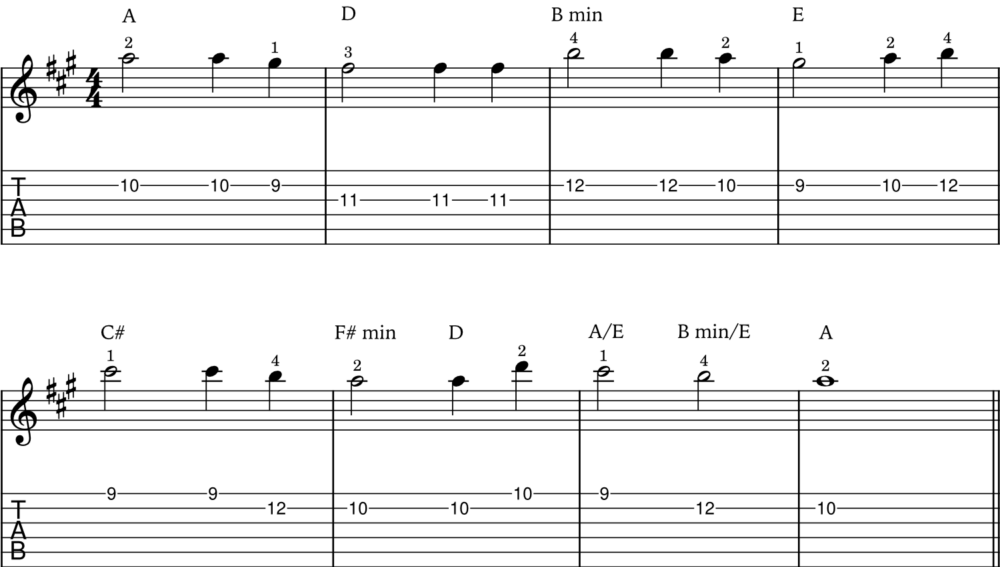
Once you have the melody down, then you want to learn and memorize the chord progression. More than trying to figure out how to voice each chord, just be able to get through the chords and know how they line up with the melody.
2. Know the chord progression

Once you are confident with the chord progression, you then focus on the chord voicings (variations of the same chord) that will have the melody notes on top.
3. Arranging your chords using triads
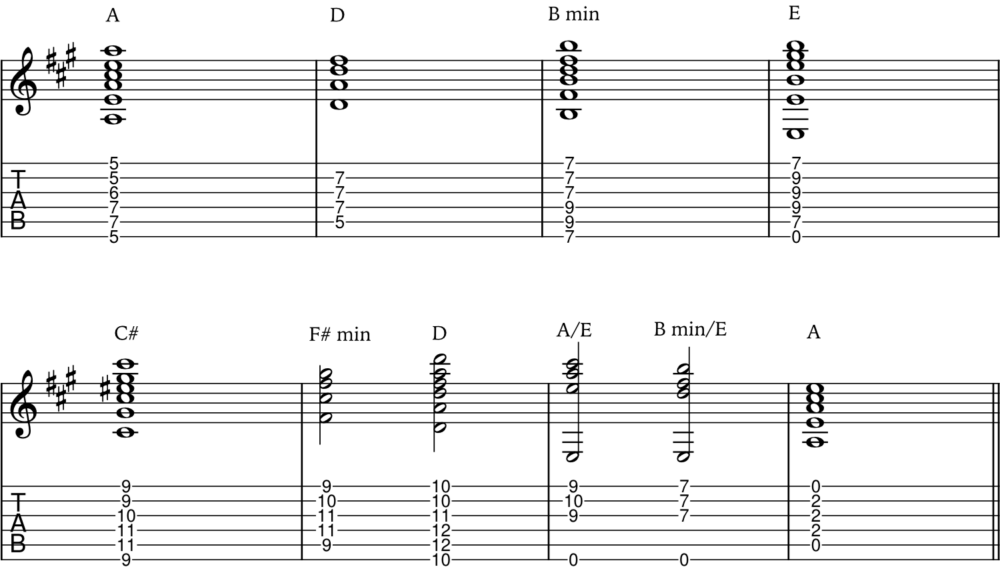
In this next step, we’re finally putting the two parts together in a very basic way. You can try holding out notes in the chord when possible.
4. Rearranging your fingers to add the melody
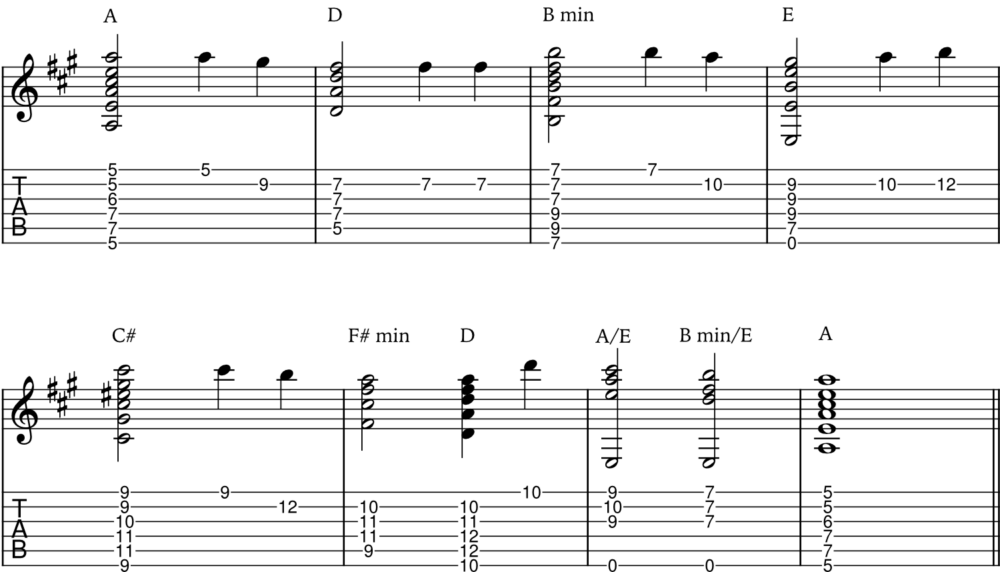
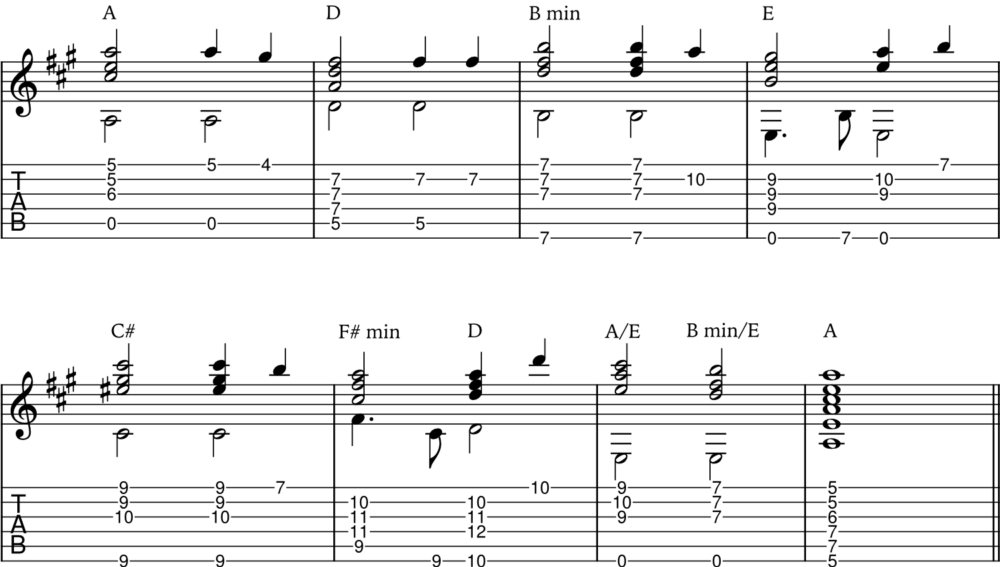
Now that we have the two parts together, we can add some a simple bass part while simplifying some chords in order to do this.
5. Adding a bass part
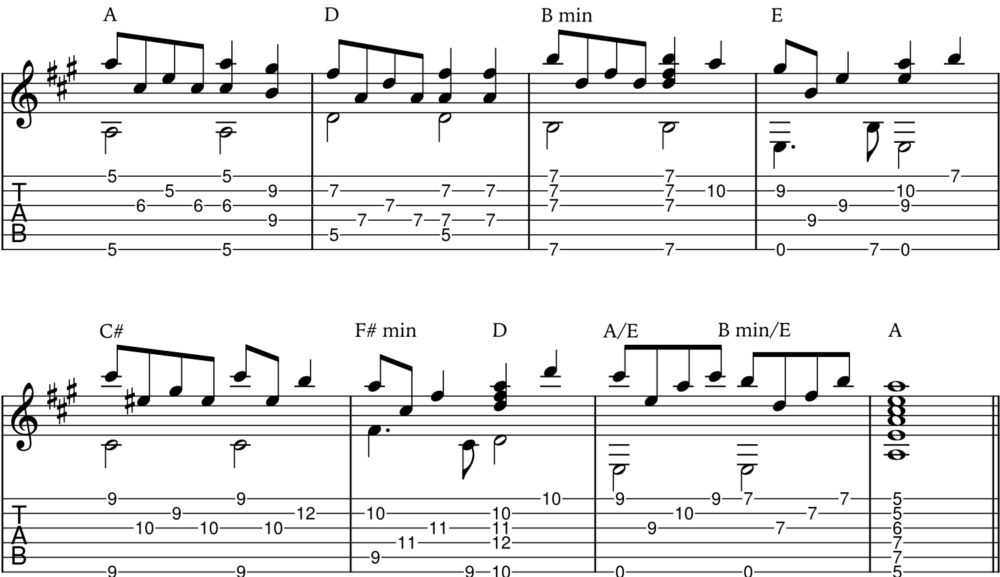
And finally, we can play arpeggios of chords to connect the two parts more smoothly and create a nice flowing effect for the arrangement. I also enhance parts of the melody by harmonizing in intervals of sixths.
6. Refining the arrangement
Wrapping up
There are many different ways you can approach the process of connecting a melody and chords on the guitar. What we covered in this lesson is a step-by-step approach by breaking the parts down into small attainable goals for your arrangement. Feel free to change up the order if it makes more sense for you to do so.
Although it can feel intimidating to try arranging a song, you will only get better as you continue to practice this skill. Challenge yourself with a short melody or phrase and then gradually progress to more advanced material. Your time and effort will be rewarded once you start hearing yourself play a melody and chords together.
You can explore examples of how to connect melody and chords in the sheet music with guitar tabs page.
📘 Get the free Practice Blueprint: Build better habits and make your progress more consistent. Download the free guide →
JG