This lesson covers 12 easy and practical guitar strumming patterns that will help you improve your playing. Strumming is an essential part of playing guitar because it’s what connects harmony (the chords) with rhythm.
You can use nice chords but without being able to strum properly, your delivery falls short.
We’ll first clarify some basic terms and concepts on strumming and time signatures before getting into the examples. Grab your guitar and let’s get started!
What is a strumming pattern?
As the name suggests, a strumming pattern is a rhythm that you can repeat when playing a chord or a series of chords.
Strumming is one of the most essential skills as a guitarist to be able to deliver the chords you know. Learning basic strumming patterns is one way to help you develop this skill because it gives you insight into what rhythms sound good and also how you can develop other strumming ideas.
Before learning different patterns, we’ll review some important information on time signatures. You can skip over to the strumming examples if you already know this.
Quick review on time signatures
Whether you are just starting out or already having experience playing different rhythms, it’s essential to know how to play strumming patterns in different time signatures.
A time signature indicates the length of each measure, which is a fragment of time that repeats throughout a song.
Common time signatures
- 4/4 time signature, indicates 4 beats in one measure.
- 3/4 time signature, indicates 3 beats in one measure.
- 6/8 time signature, indicates 6 beats in one measure.
To understand this more in-depth, you can check out this simple guide to understanding time signatures.
Let’s look at some basic guitar strumming patterns in different time signatures.
How to read the strumming patterns
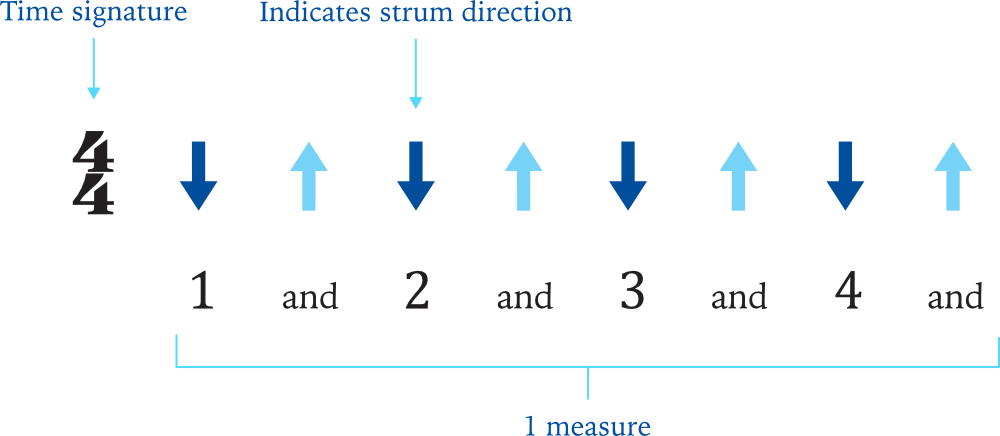
The strumming patterns will be displayed in visual form using arrows and also in standard notation.
- Time signature indicated in the beginning
- Arrow down means to strum the strings from the thicker to thinner strings.
- Arrow up means to strum the strings from the thinner to thicker strings.
- ‘Ands’ represent the eight notes in between each beat.

Strumming patterns in 4/4 time signature
We’ll look at four examples in each of the time signatures we mentioned earlier. When there is no arrow on a beat, you can keep the sound of the chord you’re playing.
I recommend repeating/looping each example so that you get a better feel of the strumming pattern. Once you’re able to, start memorizing it and play it without look at the chart.
Choose any chord you like to play the examples. I recommend reviewing these basic chords lesson before learning the following strumming patterns.
Strumming pattern 1
I am using a G Major chord to play these examples which can listen to below each strumming pattern. Each example is repeated for 2 measures.
This first pattern is very straightforward but you want to be able to master strumming up and down consistently as your foundation to then learn other strumming patterns and variations.

Strumming pattern 2

Strumming pattern 3

Strumming pattern 4

Strumming patterns in 3/4 time signature
Strumming pattern 5

Strumming pattern 6

Strumming pattern 7


Strumming pattern 8

Strumming patterns in 6/8 time signature
Strumming pattern 9

Strumming pattern 10

Strumming pattern 11
Strumming pattern 11

Strumming pattern 12

Backing tracks to practice strumming patterns
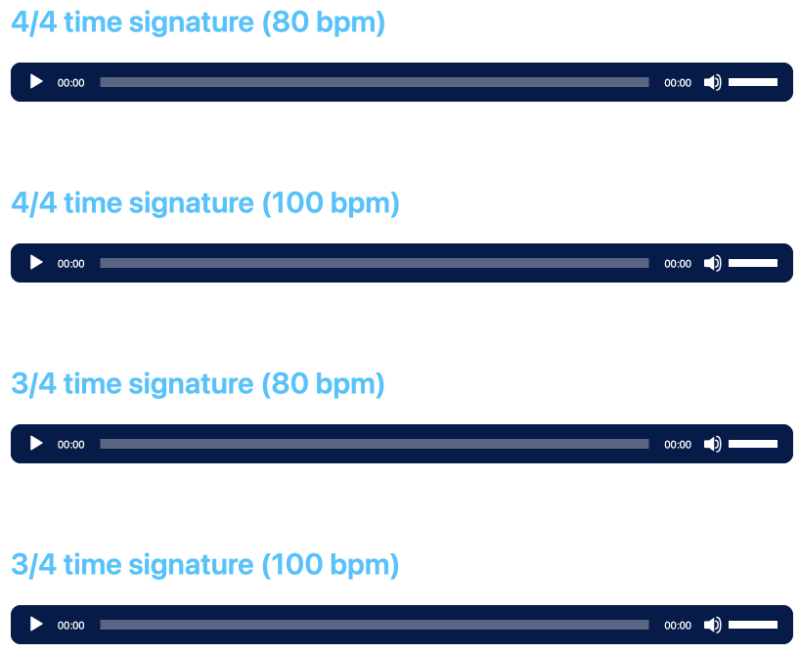
These backing tracks are drum tracks for you to practice the strumming patterns we just covered. No harmony is added so that you can play whatever chords you choose over the backing track.
I recommend starting with the backing tracks at a slower tempo and then trying it at the faster tempo.
🔒 This section is for Pro Members only.
*bpm = beats per minute

Tips for improving your strumming
- Use a metronome or backing track to improve the timing of your strumming. Always start at a slower tempo and gradually bring up the tempo as you feel more comfortable with a pattern. Here is a free metronome on our site.
- Start with one chord at a time. Once you get the pattern down, try switching between other chords and keeping the pattern going.
- Learn strumming patterns from songs you like. This can give you greater motivation to learn a pattern, as well as work on transitioning between chords.
👉 See all tips in 7 Ways to Get Better at Strumming on Guitar
Wrapping up
We covered 12 easy strumming patterns in different time signatures as a guide to get you started. Feel free to combine patterns with the same time signature and experiment with patterns that sound good to you.
As you keep learning new strumming patterns and playing along with songs you like, strumming will come more naturally to you and your sense of musicality will improve.
Learning strumming patterns can also help you improve your sense of rhythm and challenge you to get better at switching between chords in time.
If you’re getting started, I suggest isolating some of your practice time specifically to strumming. You can practice strumming patterns as a part of your practice routine which I talk about in the free guitar practice guide to help you stay on track of your musical goals.
Ready to take things up a notch? See this lesson on how to instantly make your strumming sound more musical.
📘 Get the free guitar practice guide here!
Original photo by Jefferson Santos on Unsplash
Start Playing Better, Faster
with Pro Membership! ✨
Get the guidance, tools, and support that keep your progress on track:
🏁 Always know what to practice next. Access the full Guitar Learning Roadmap with lessons in sequence.
🎼 Play songs with confidence. Step-by-step lessons of popular, classical pieces and other styles.
📙 Save time and frustration. Clear PDFs and ebooks that save time so you can focus on playing.
🎟️ Get rewarded for consistency. 2 free downloads every month (a $240+ yearly value).
🎁 Keep costs low while you grow. 50% off all charts, tracks, and posters — up to 75% off bundles.
🚫 Stay focused. Ad-free environment keeps you in the zone.
💬 Get help when you need it. Direct member support to keep you on track.


